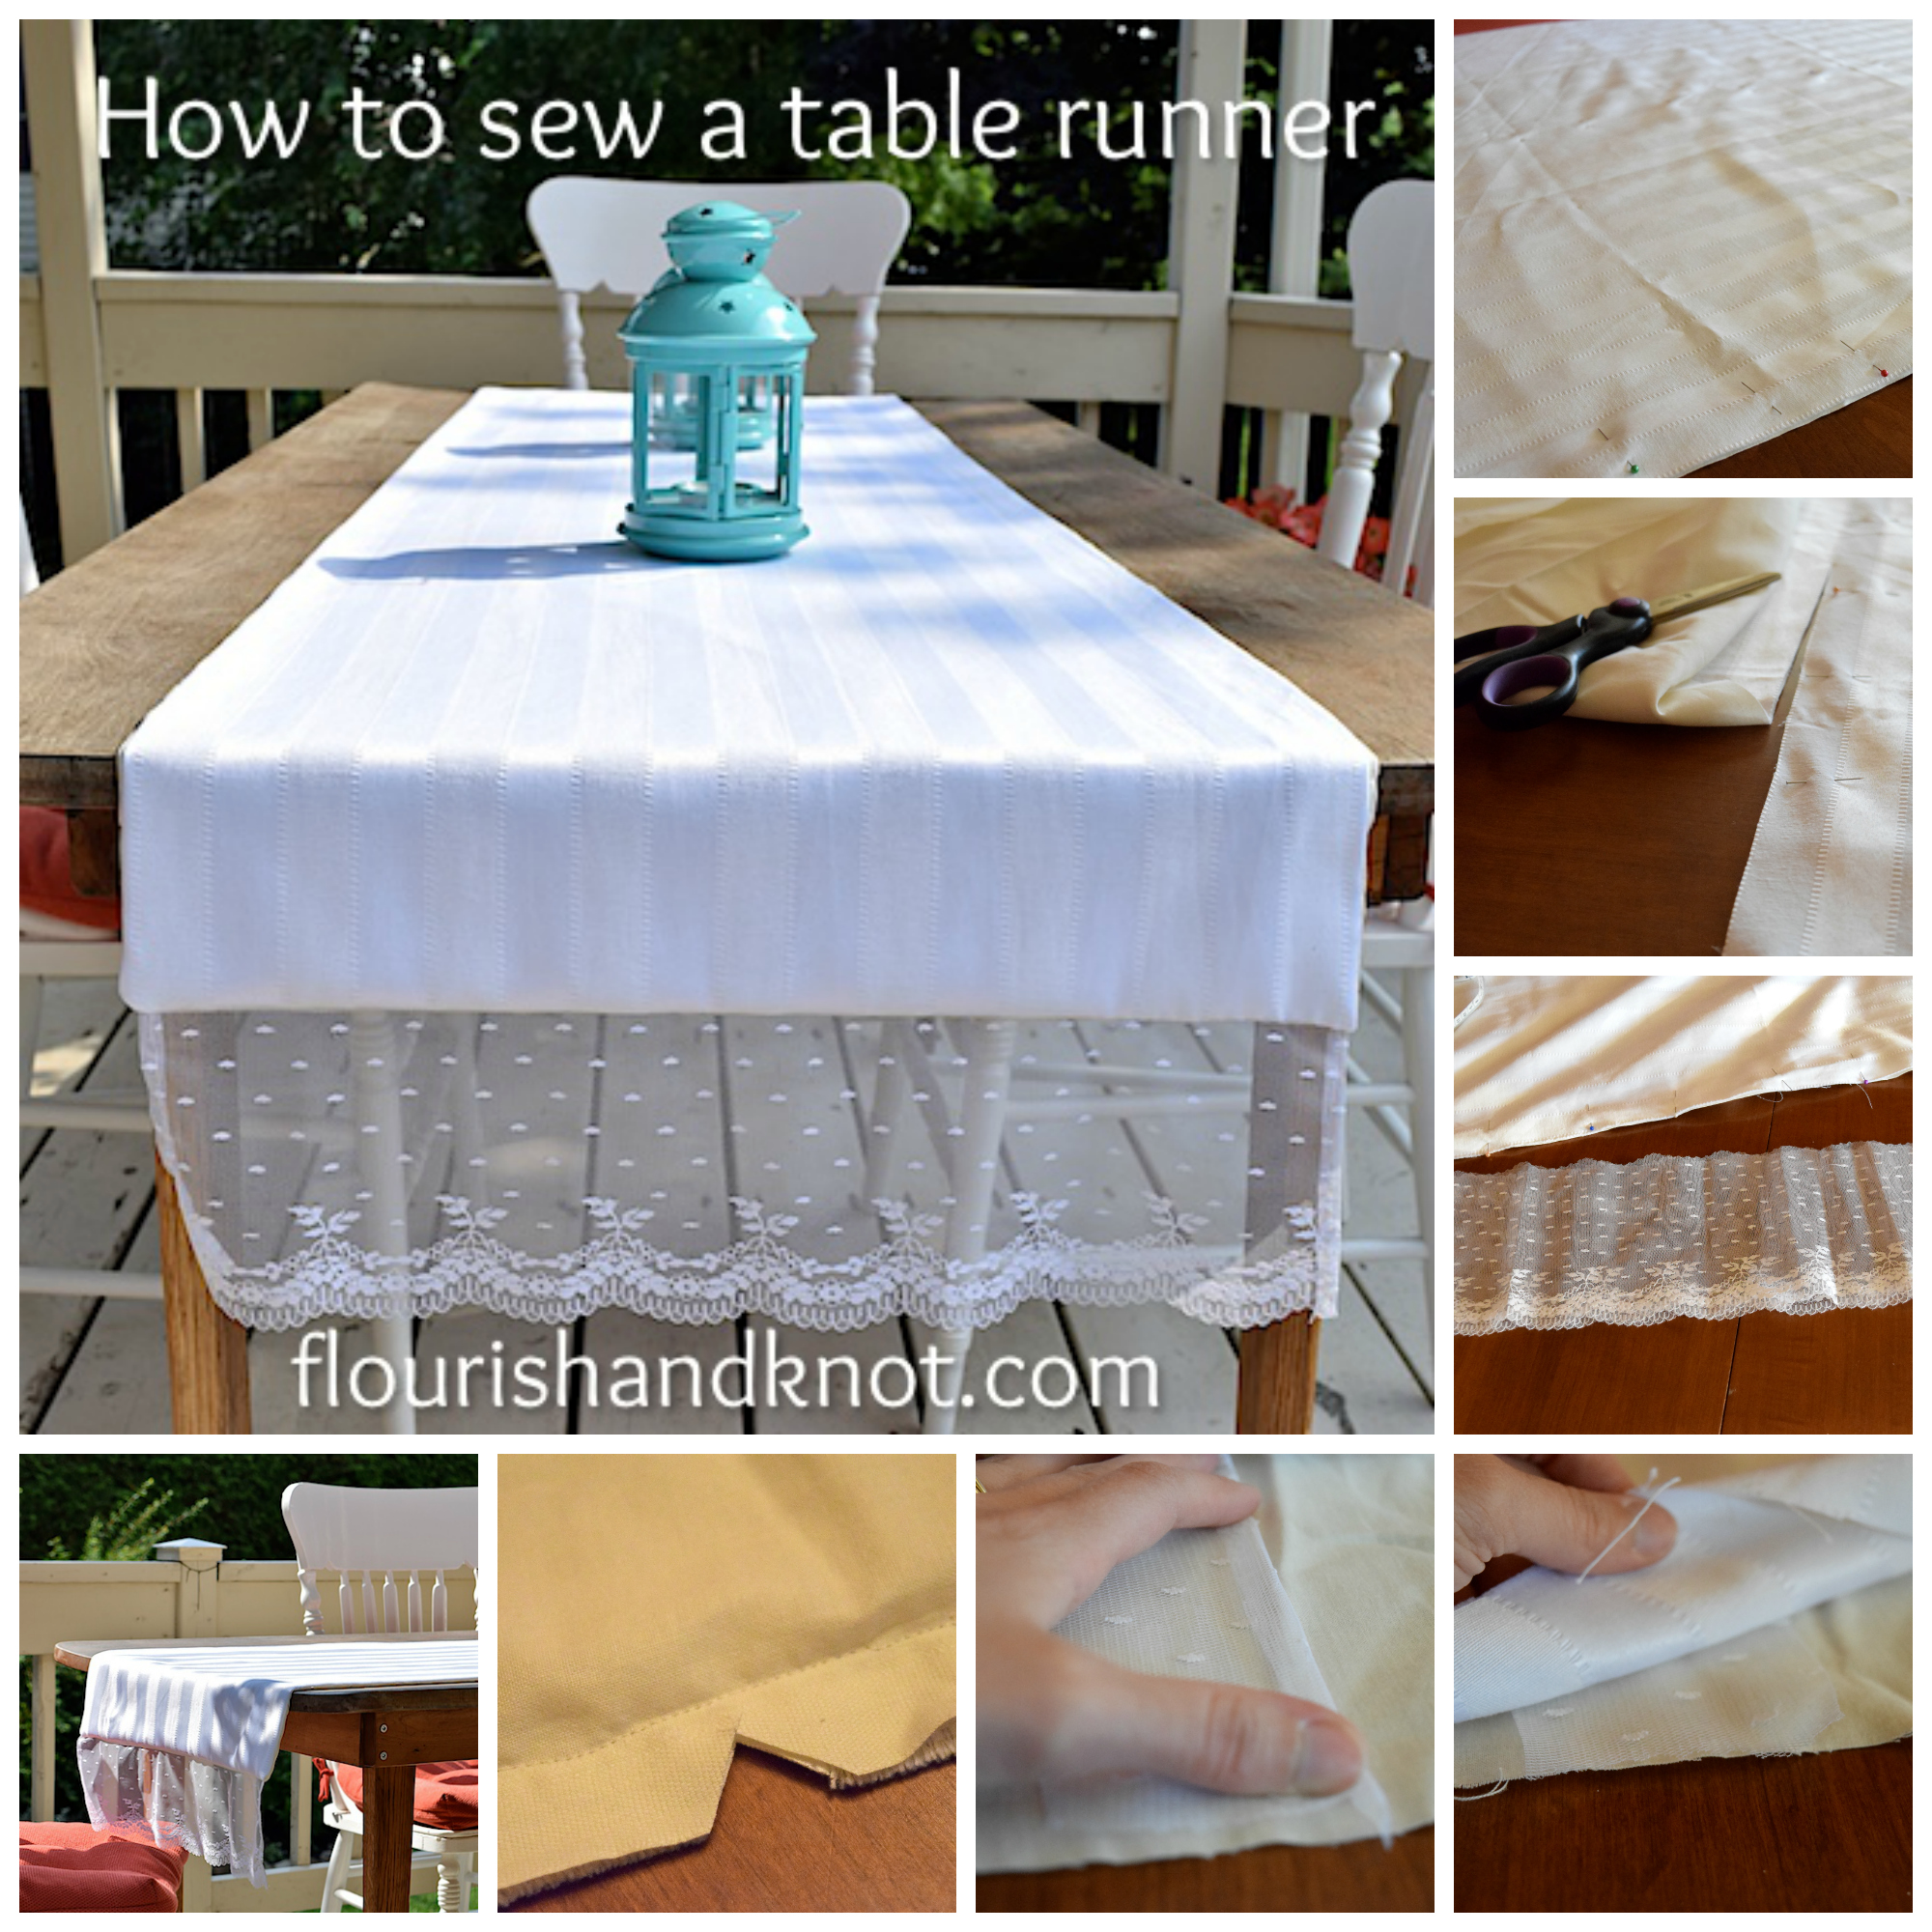
One night a few weeks ago, in the midst of preparing school concerts, I decided that I needed to do something, anything, unrelated to music. I love music. It’s kinda my life and all. But I just needed an escape from beginner-violin-meets-beginner-trombone. You know what I mean?
So I whipped out my trusty sewing machine and got to work making a simple table runner for our deck. I wanted something that would be, as they say, « polyvalente »: not too formal but nice enough to dress up.
You saw my handiwork in situ in this post about my summery table setting! In case you’ve forgotten how very marvellous it looked… 
But what you see there started life in my mother’s fabric stash as simply two pieces of leftover fabric. In just a couple of hours (and let’s face it: I say « hours » because I spent some quality time with my seam-ripper at one point), I turned it into a sweet and stylish runner. Here’s how to make one for yourself! 
1. Choose your fabric and a matching (or contrasting and make it reversible!) lining fabric. I wish I’d thought to make it reversible… Next time.
2. Measure the length and width of your table to decide how long to make it. You want the runner to hang over the end of the table so that it doesn’t look skimpy! I gave mine about three inches, plus I added the lace detail. Don’t forget that you need a seam allowance. I’d make sure to leave at least an extra 2-4 cm for every seam.
3. Pin your fabrics, right sides together. Cut to the desired length/width. 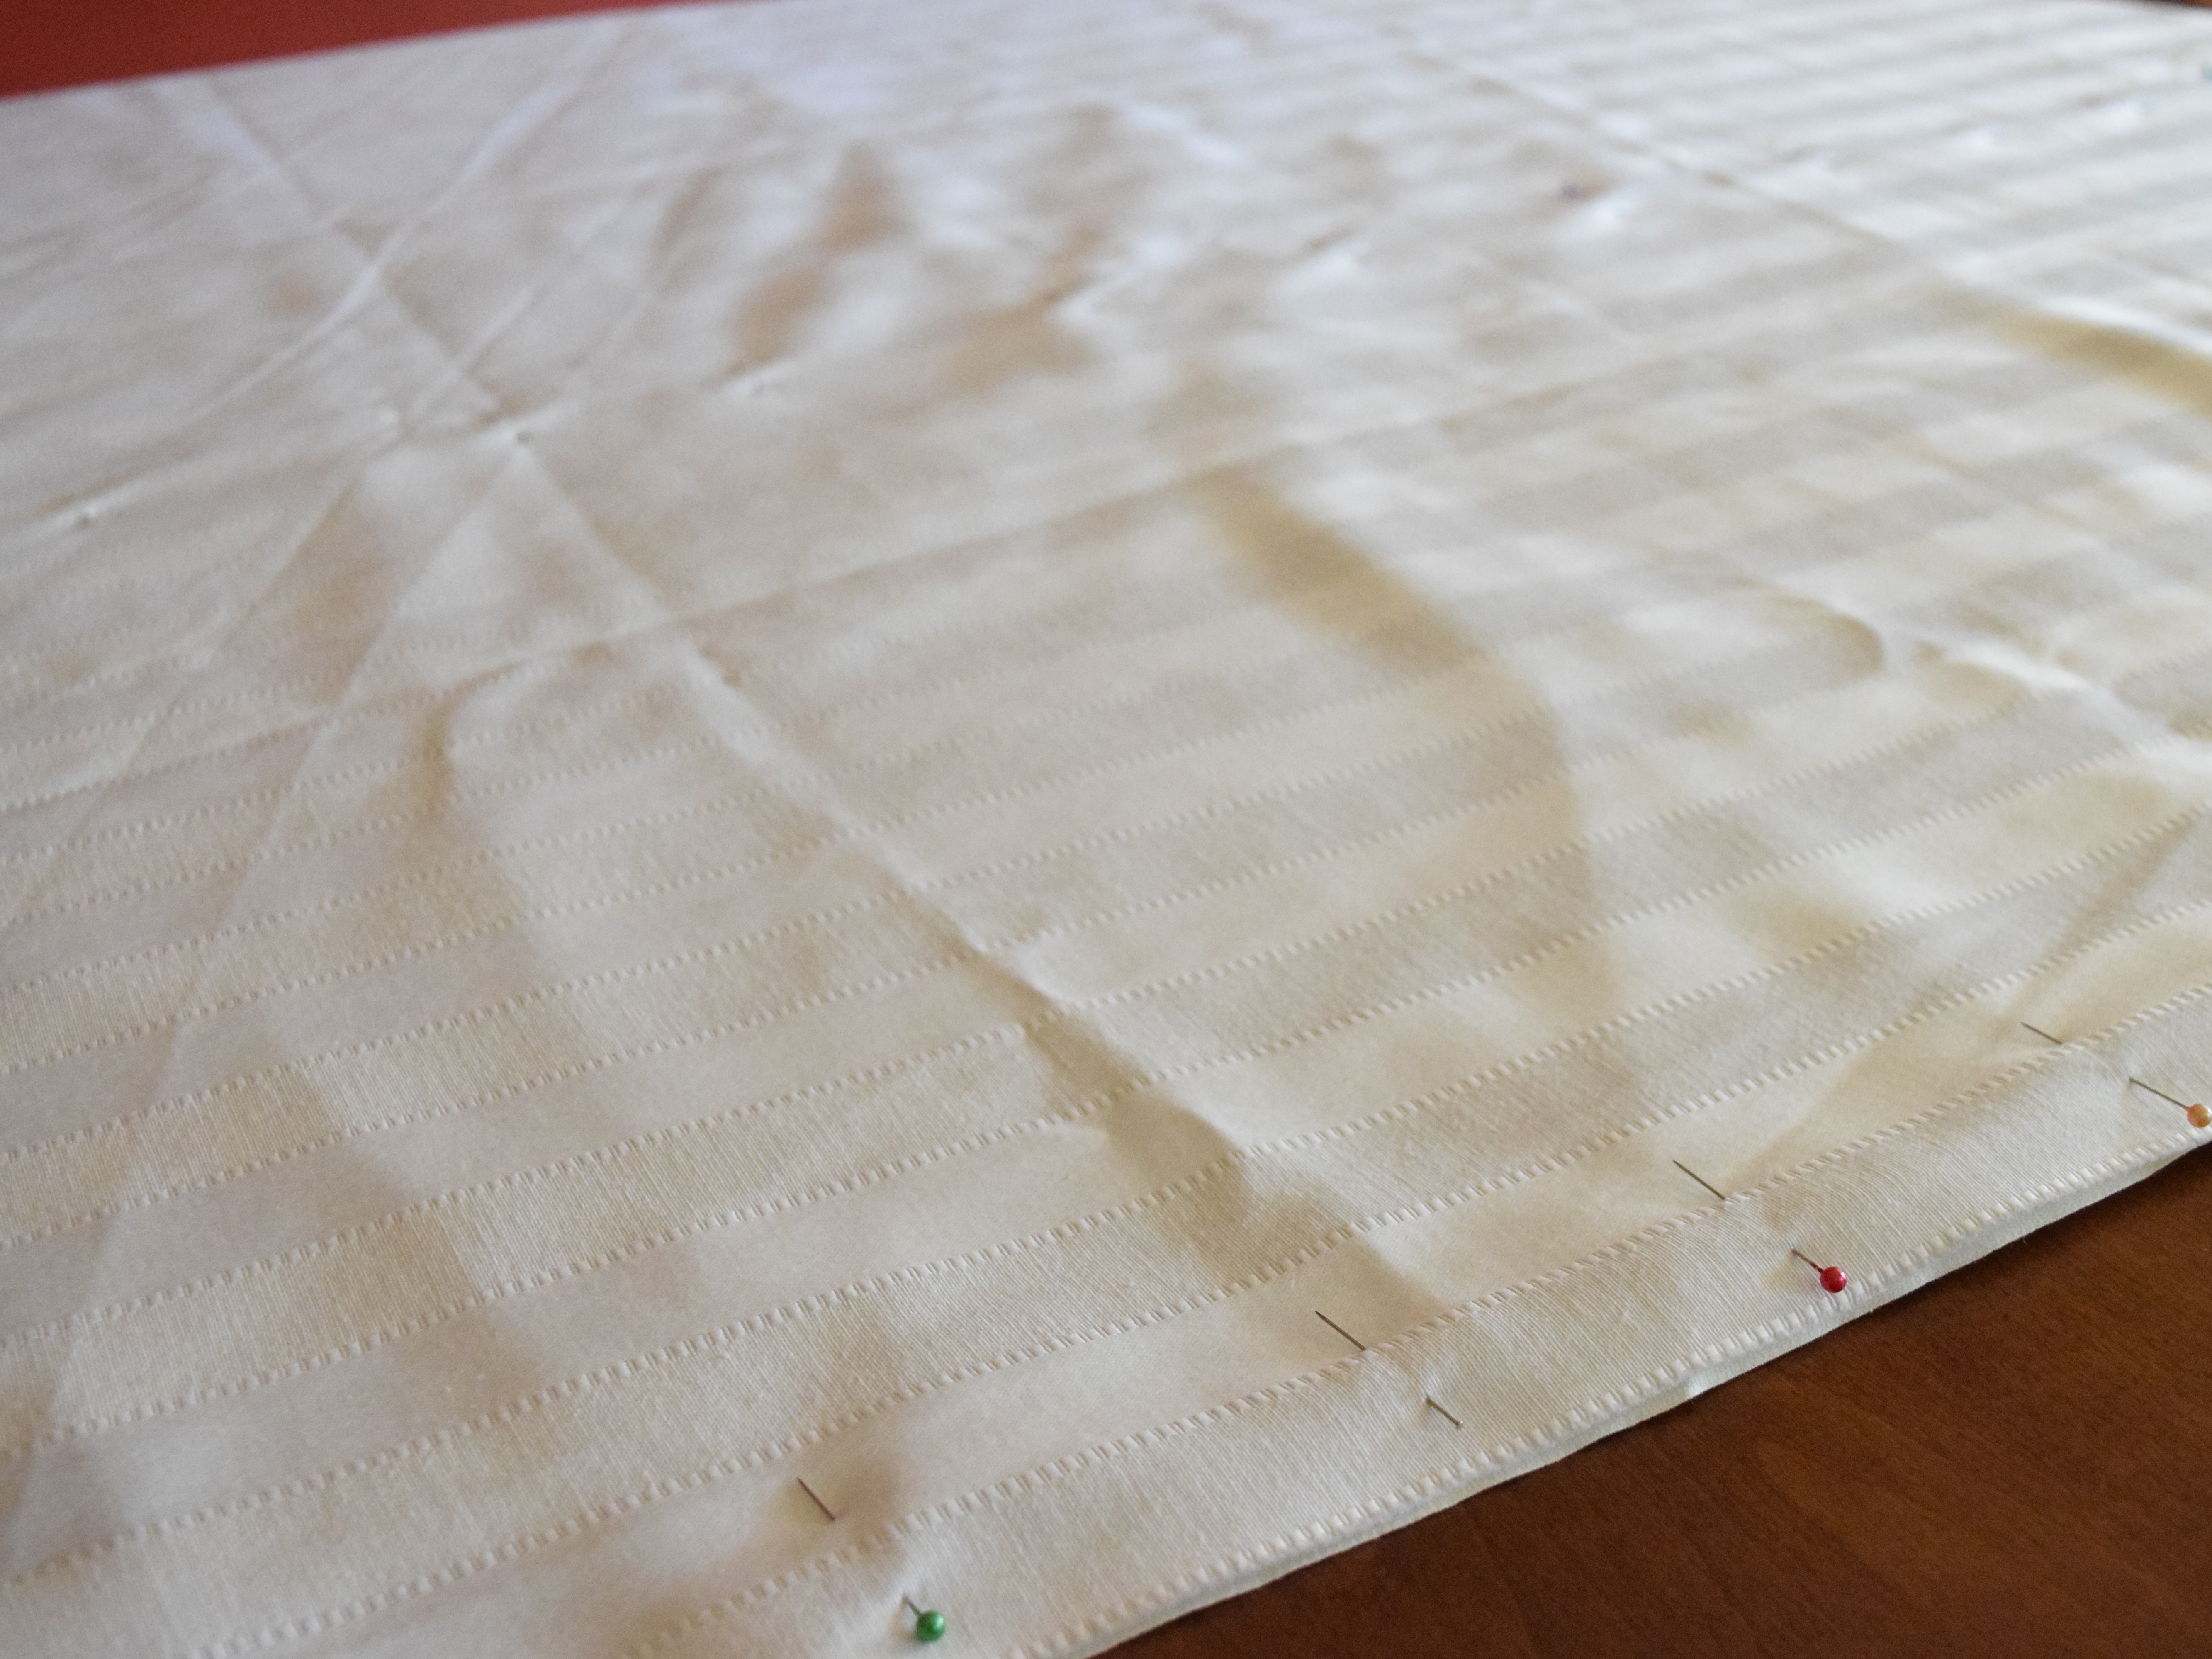
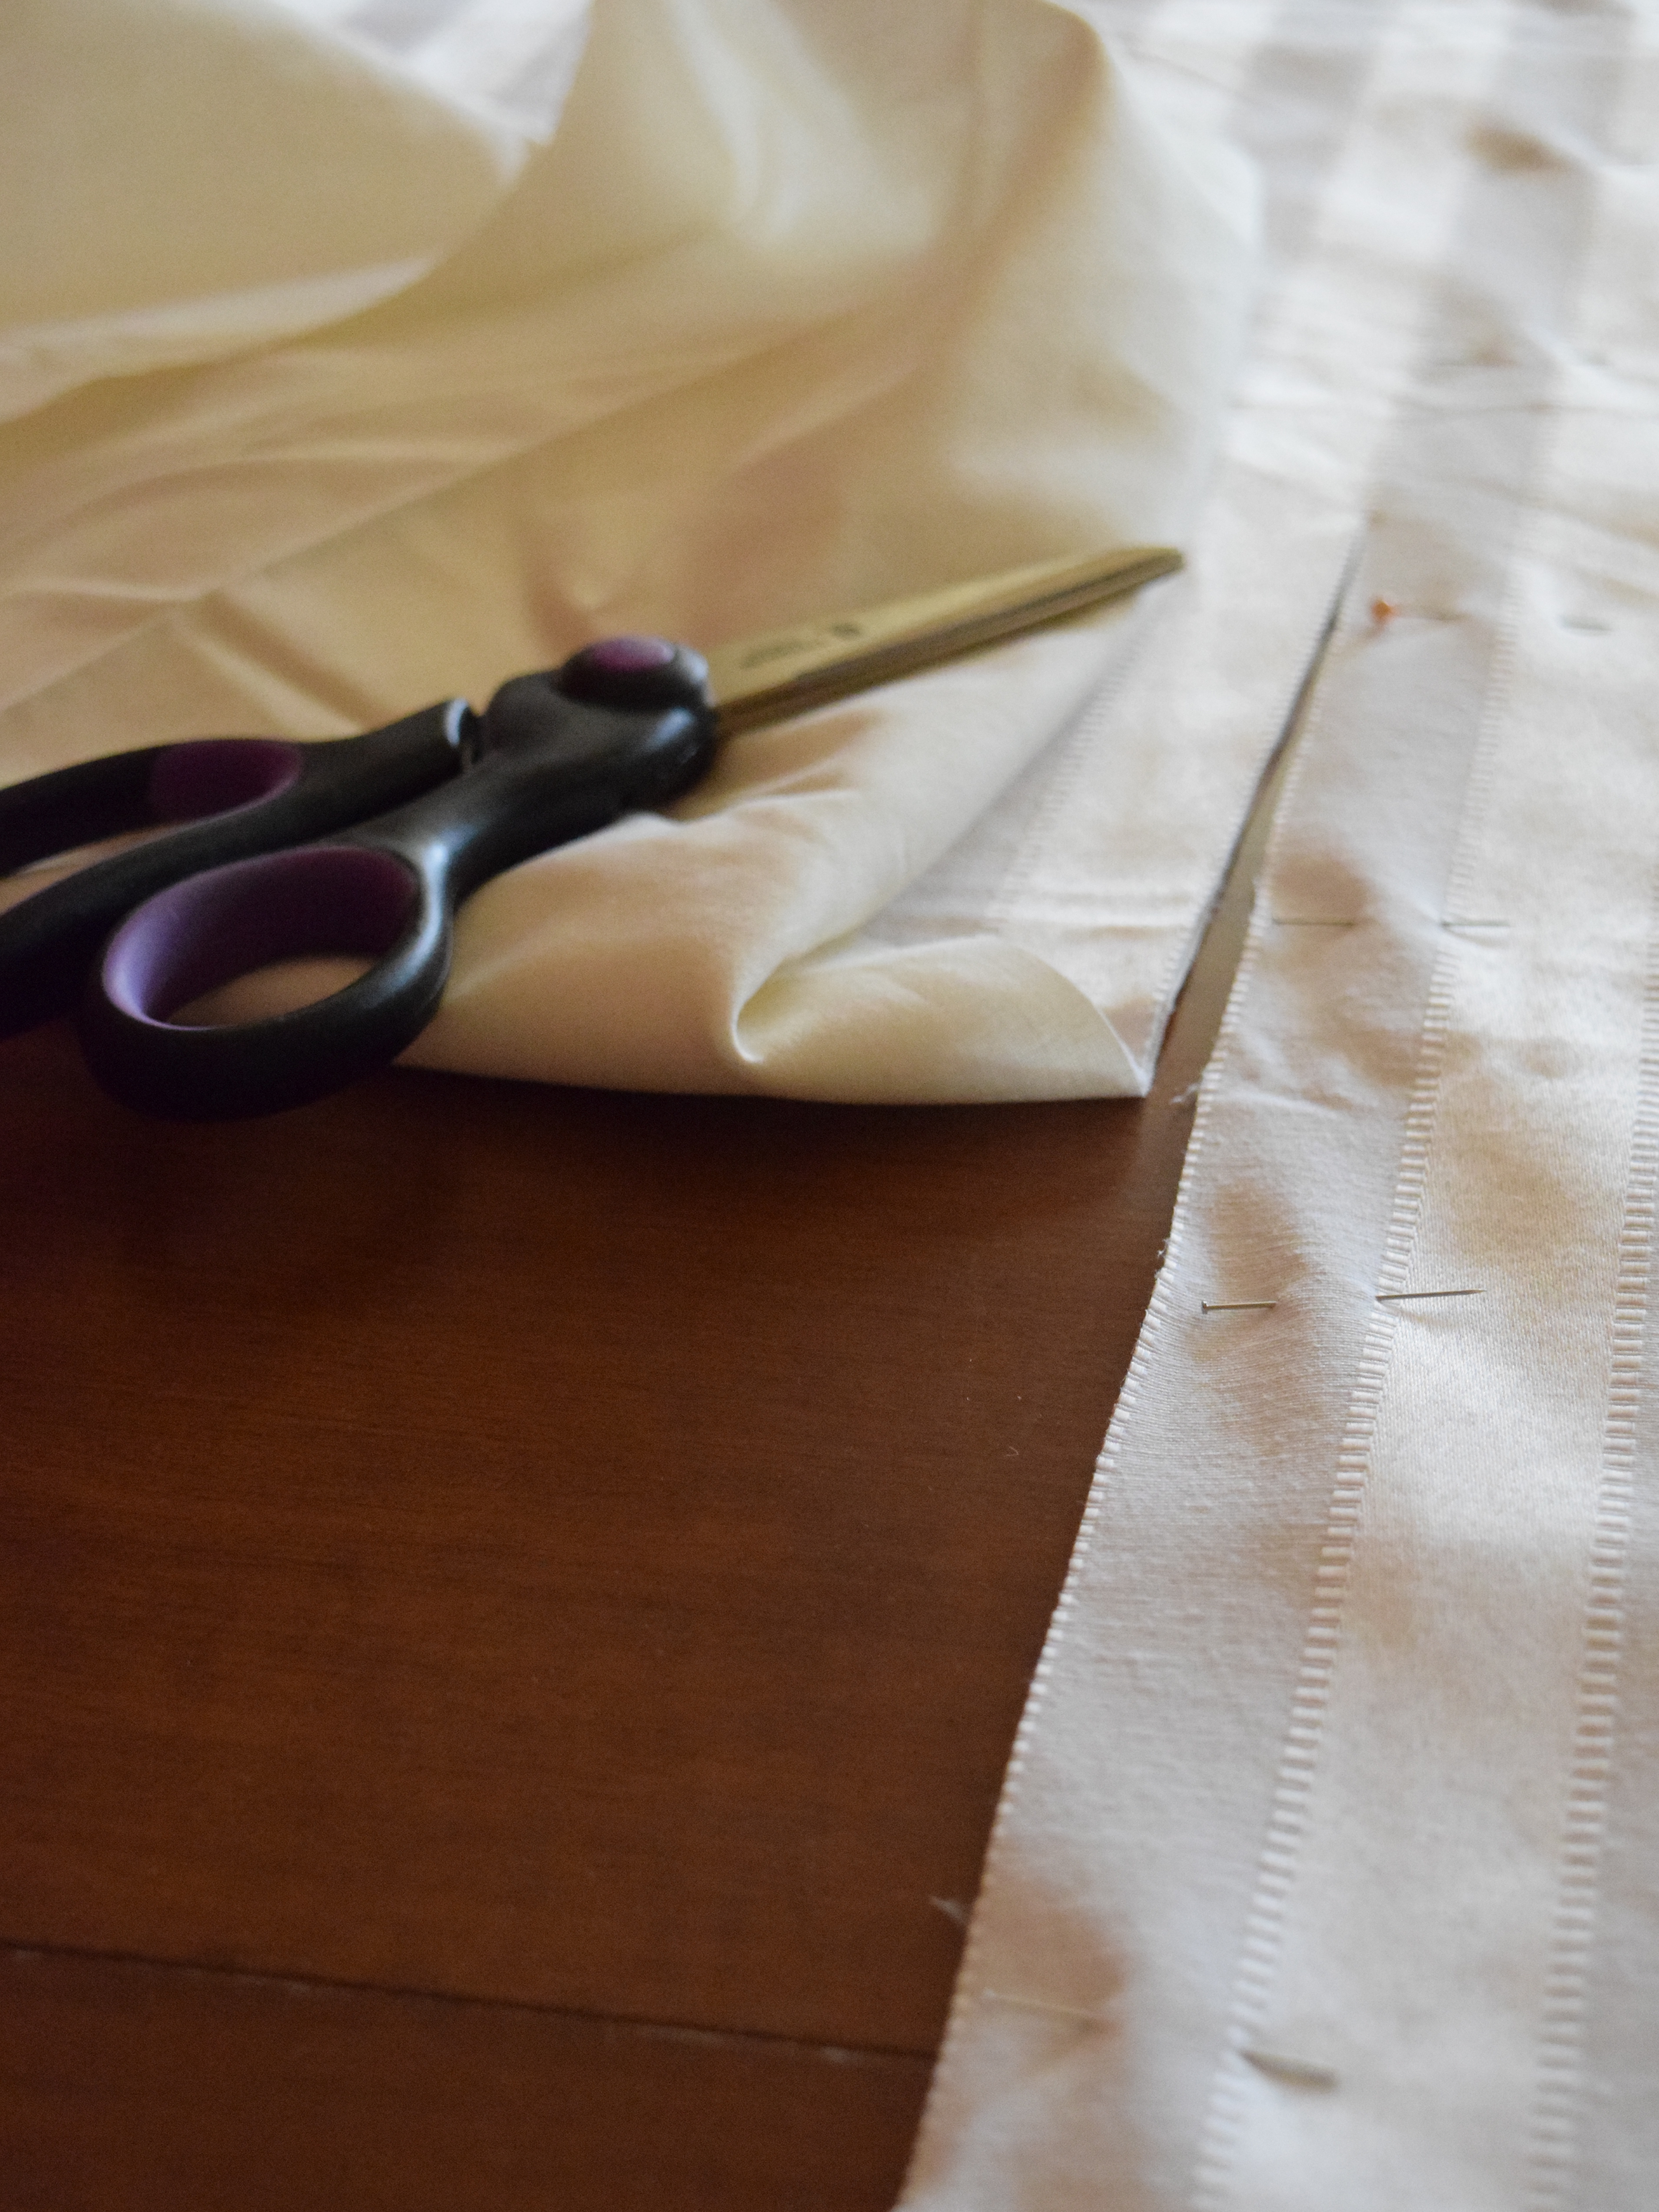
4. Sew straight seams down each long side. (Straight seams: aye, there’s the rub.)
5. If you are adding ribbon or lace or a contrasting band of fabric at the bottom, you need to prepare it. I was using lace, so I did a small rolled hem on each side.
6. Now here’s the tricky part. (If you’re not edging your runner, then don’t worry about this!) You need to put the lace up between the two pieces of fabric, with the bottom of the lace (in my case, the scalloped side) farthest away from the seam. 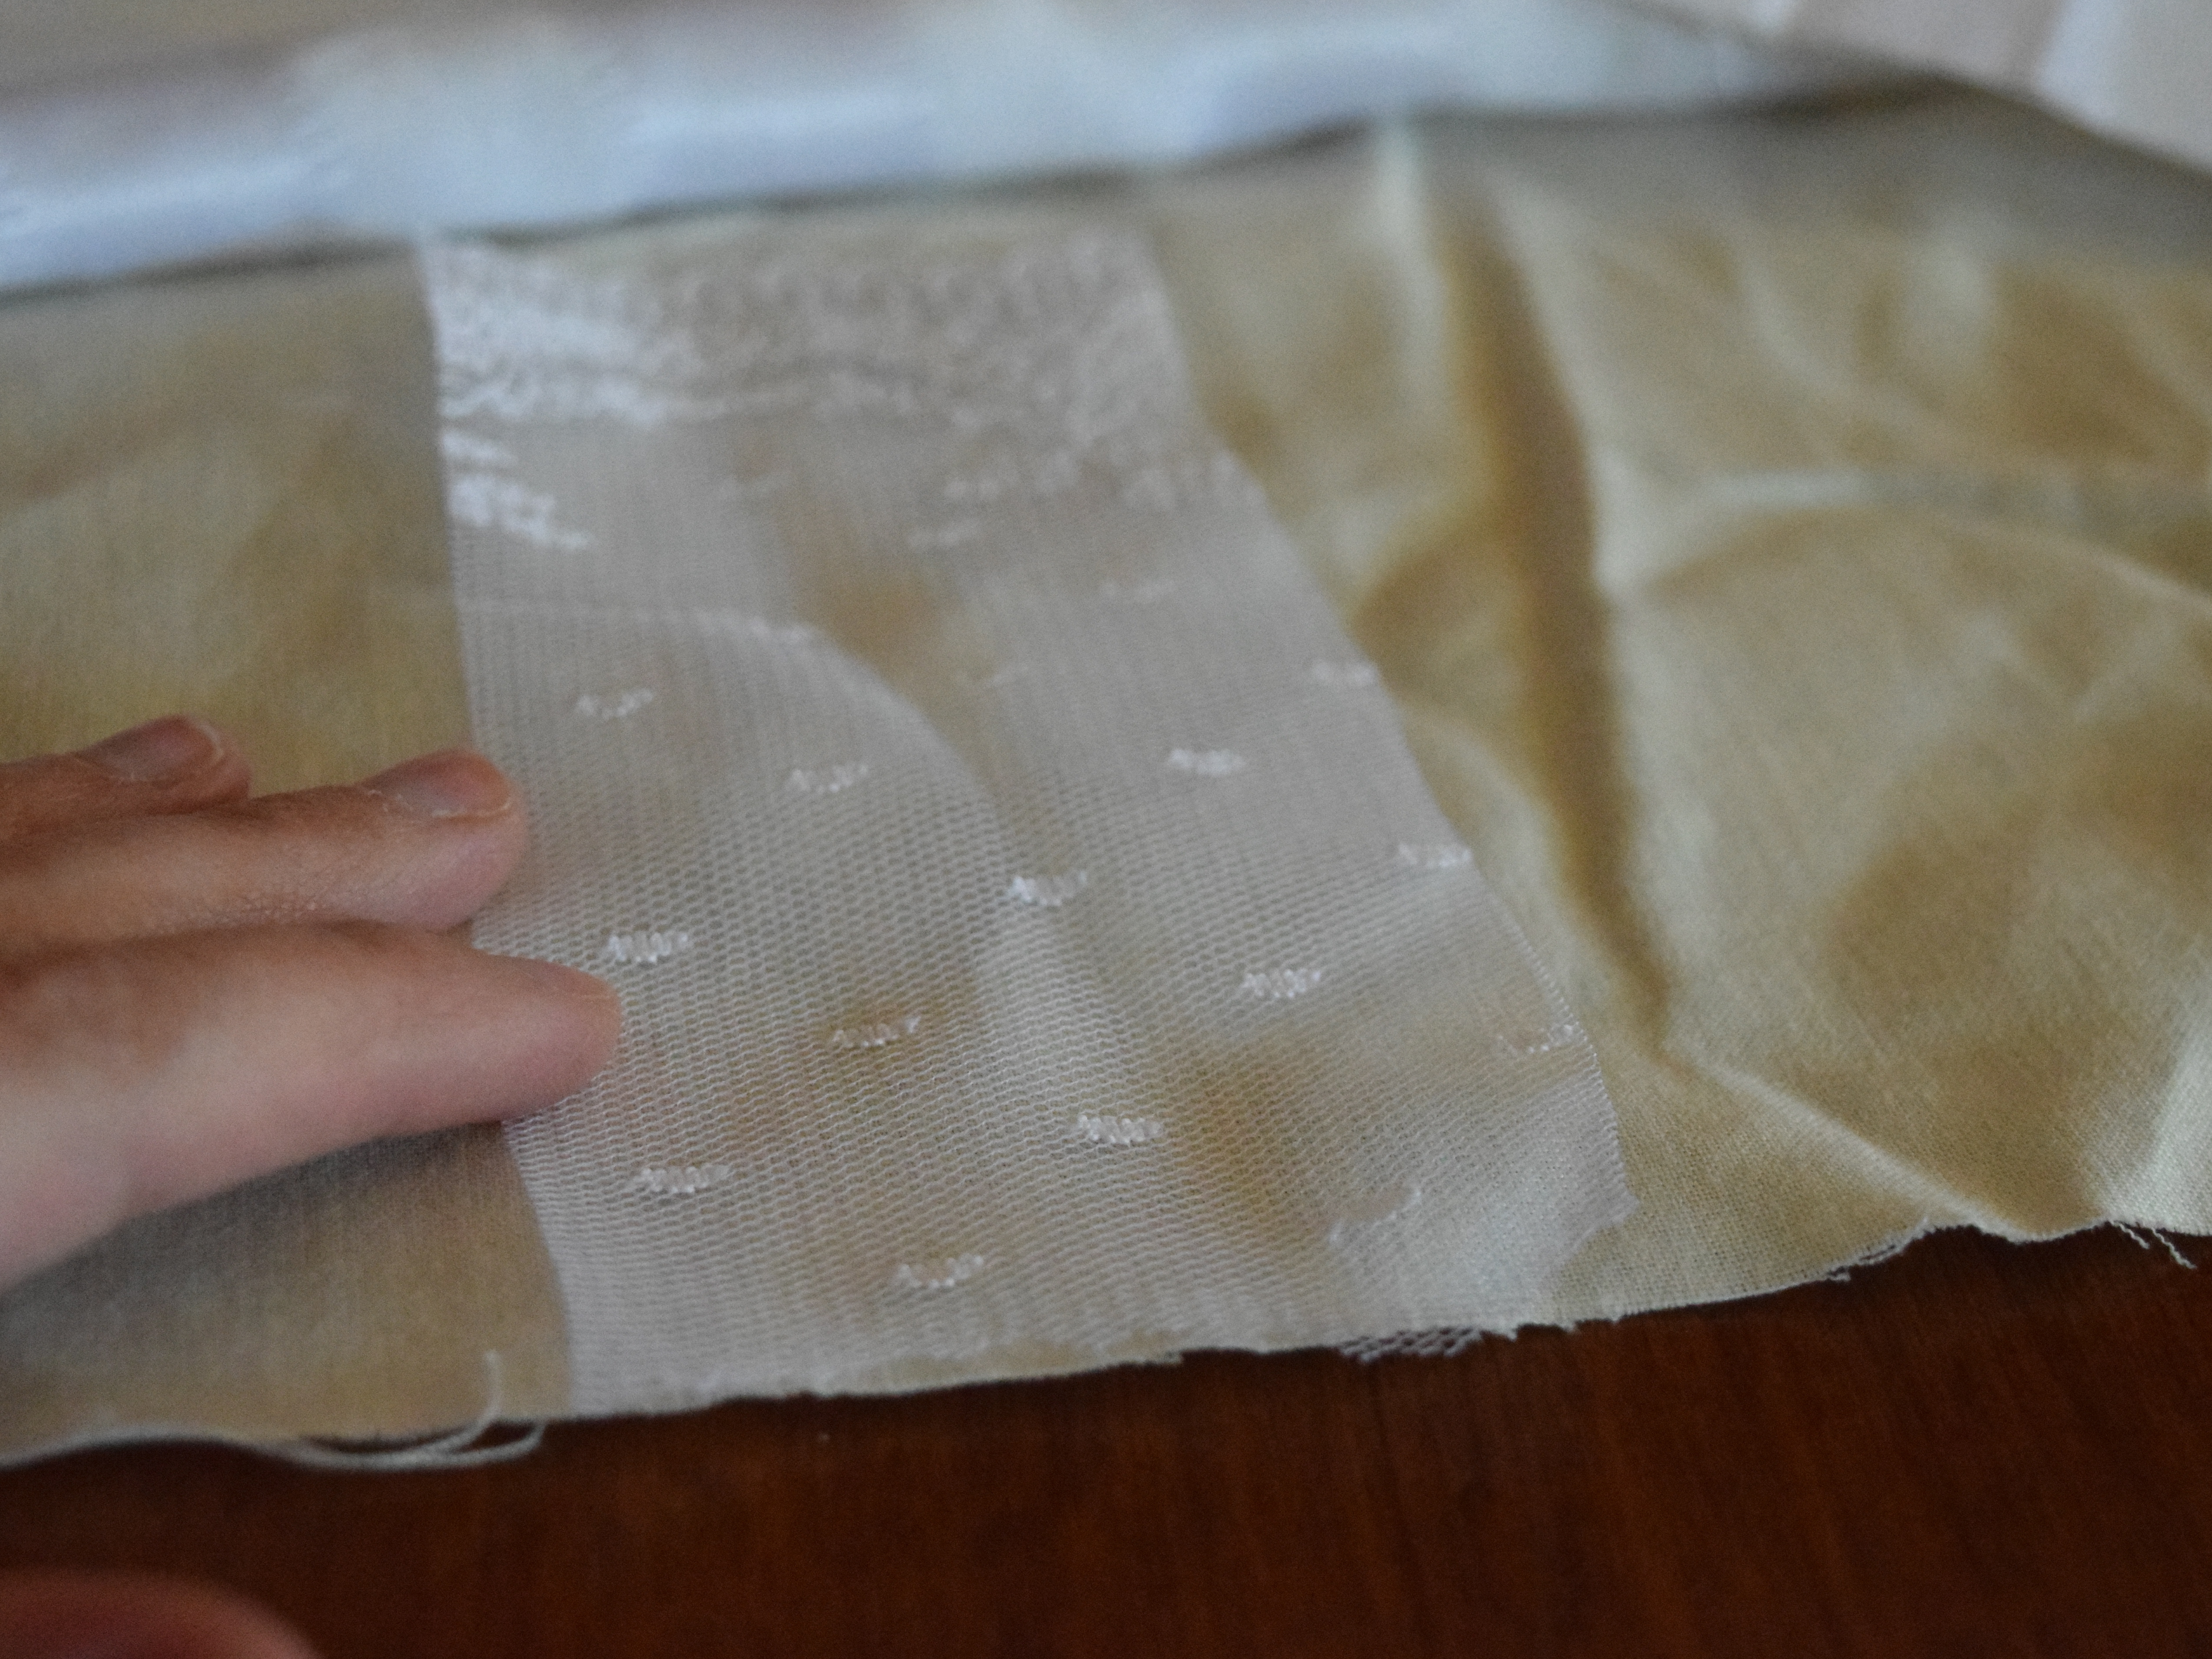
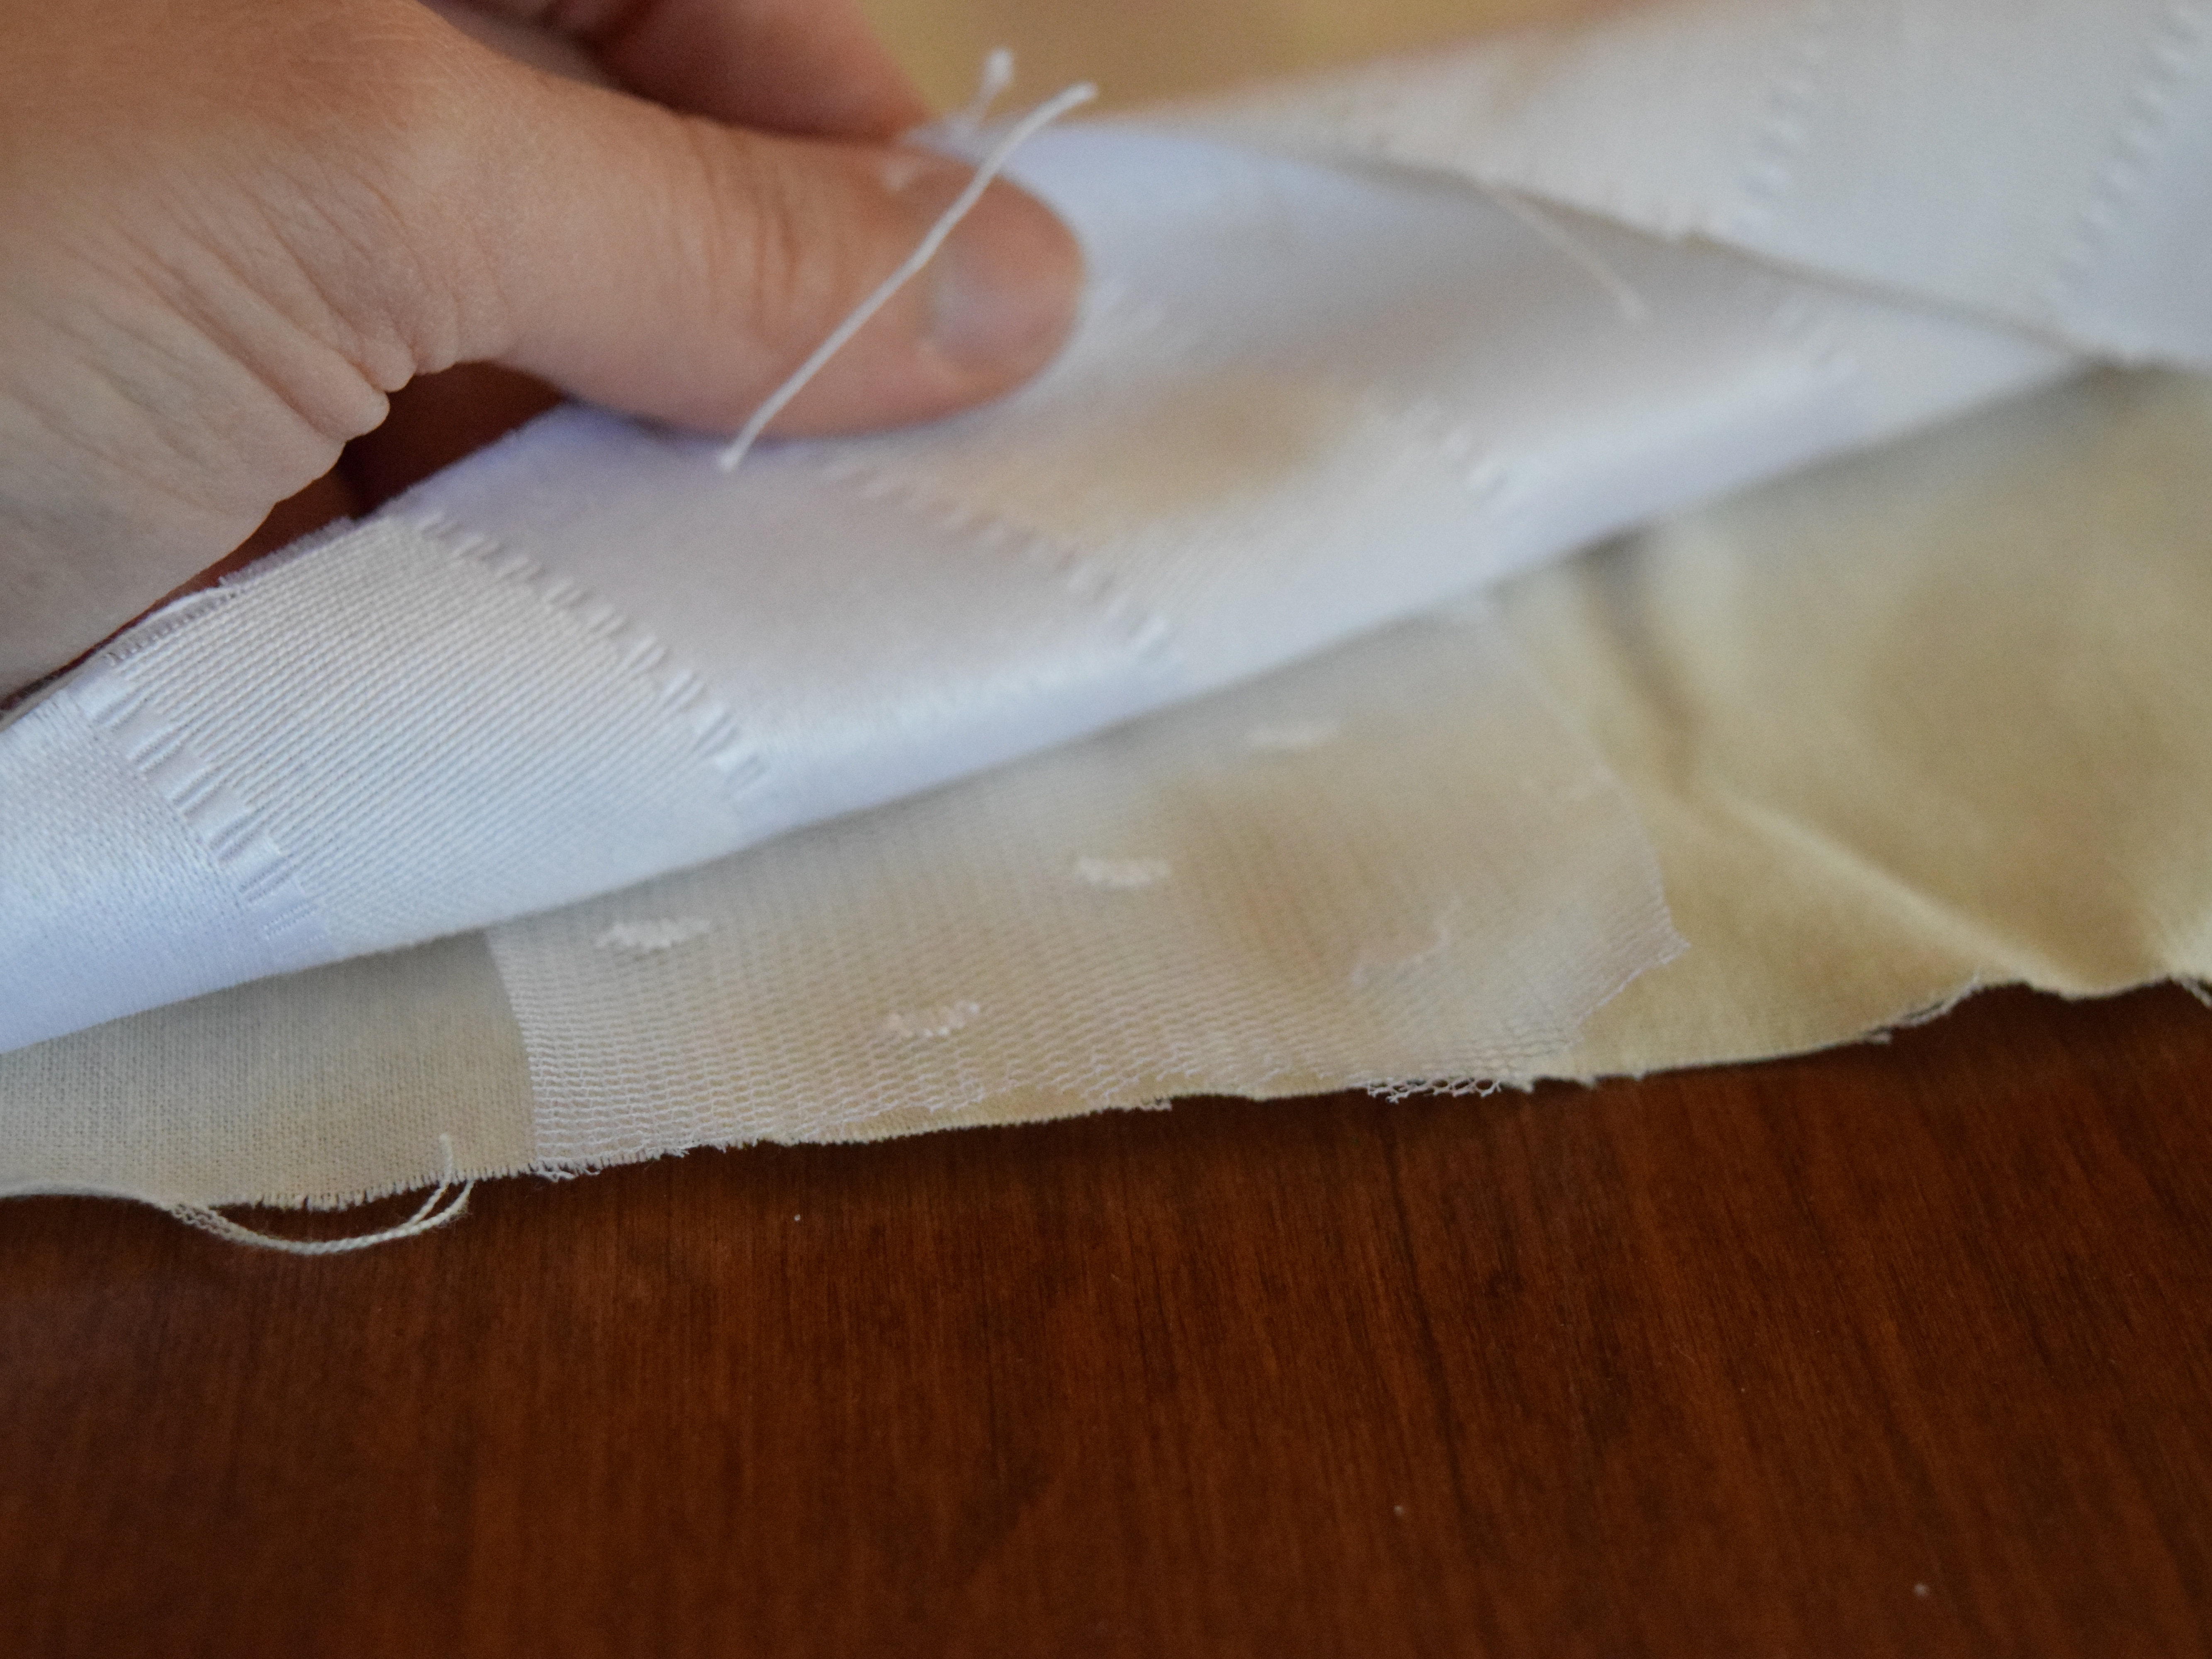
If there’s a hem on it (as in mine), the wrong side of the hem needs to be on top of the lining fabric. If you’ve never done this sort of thing, just look at the picture, it’ll make a lot more sense. 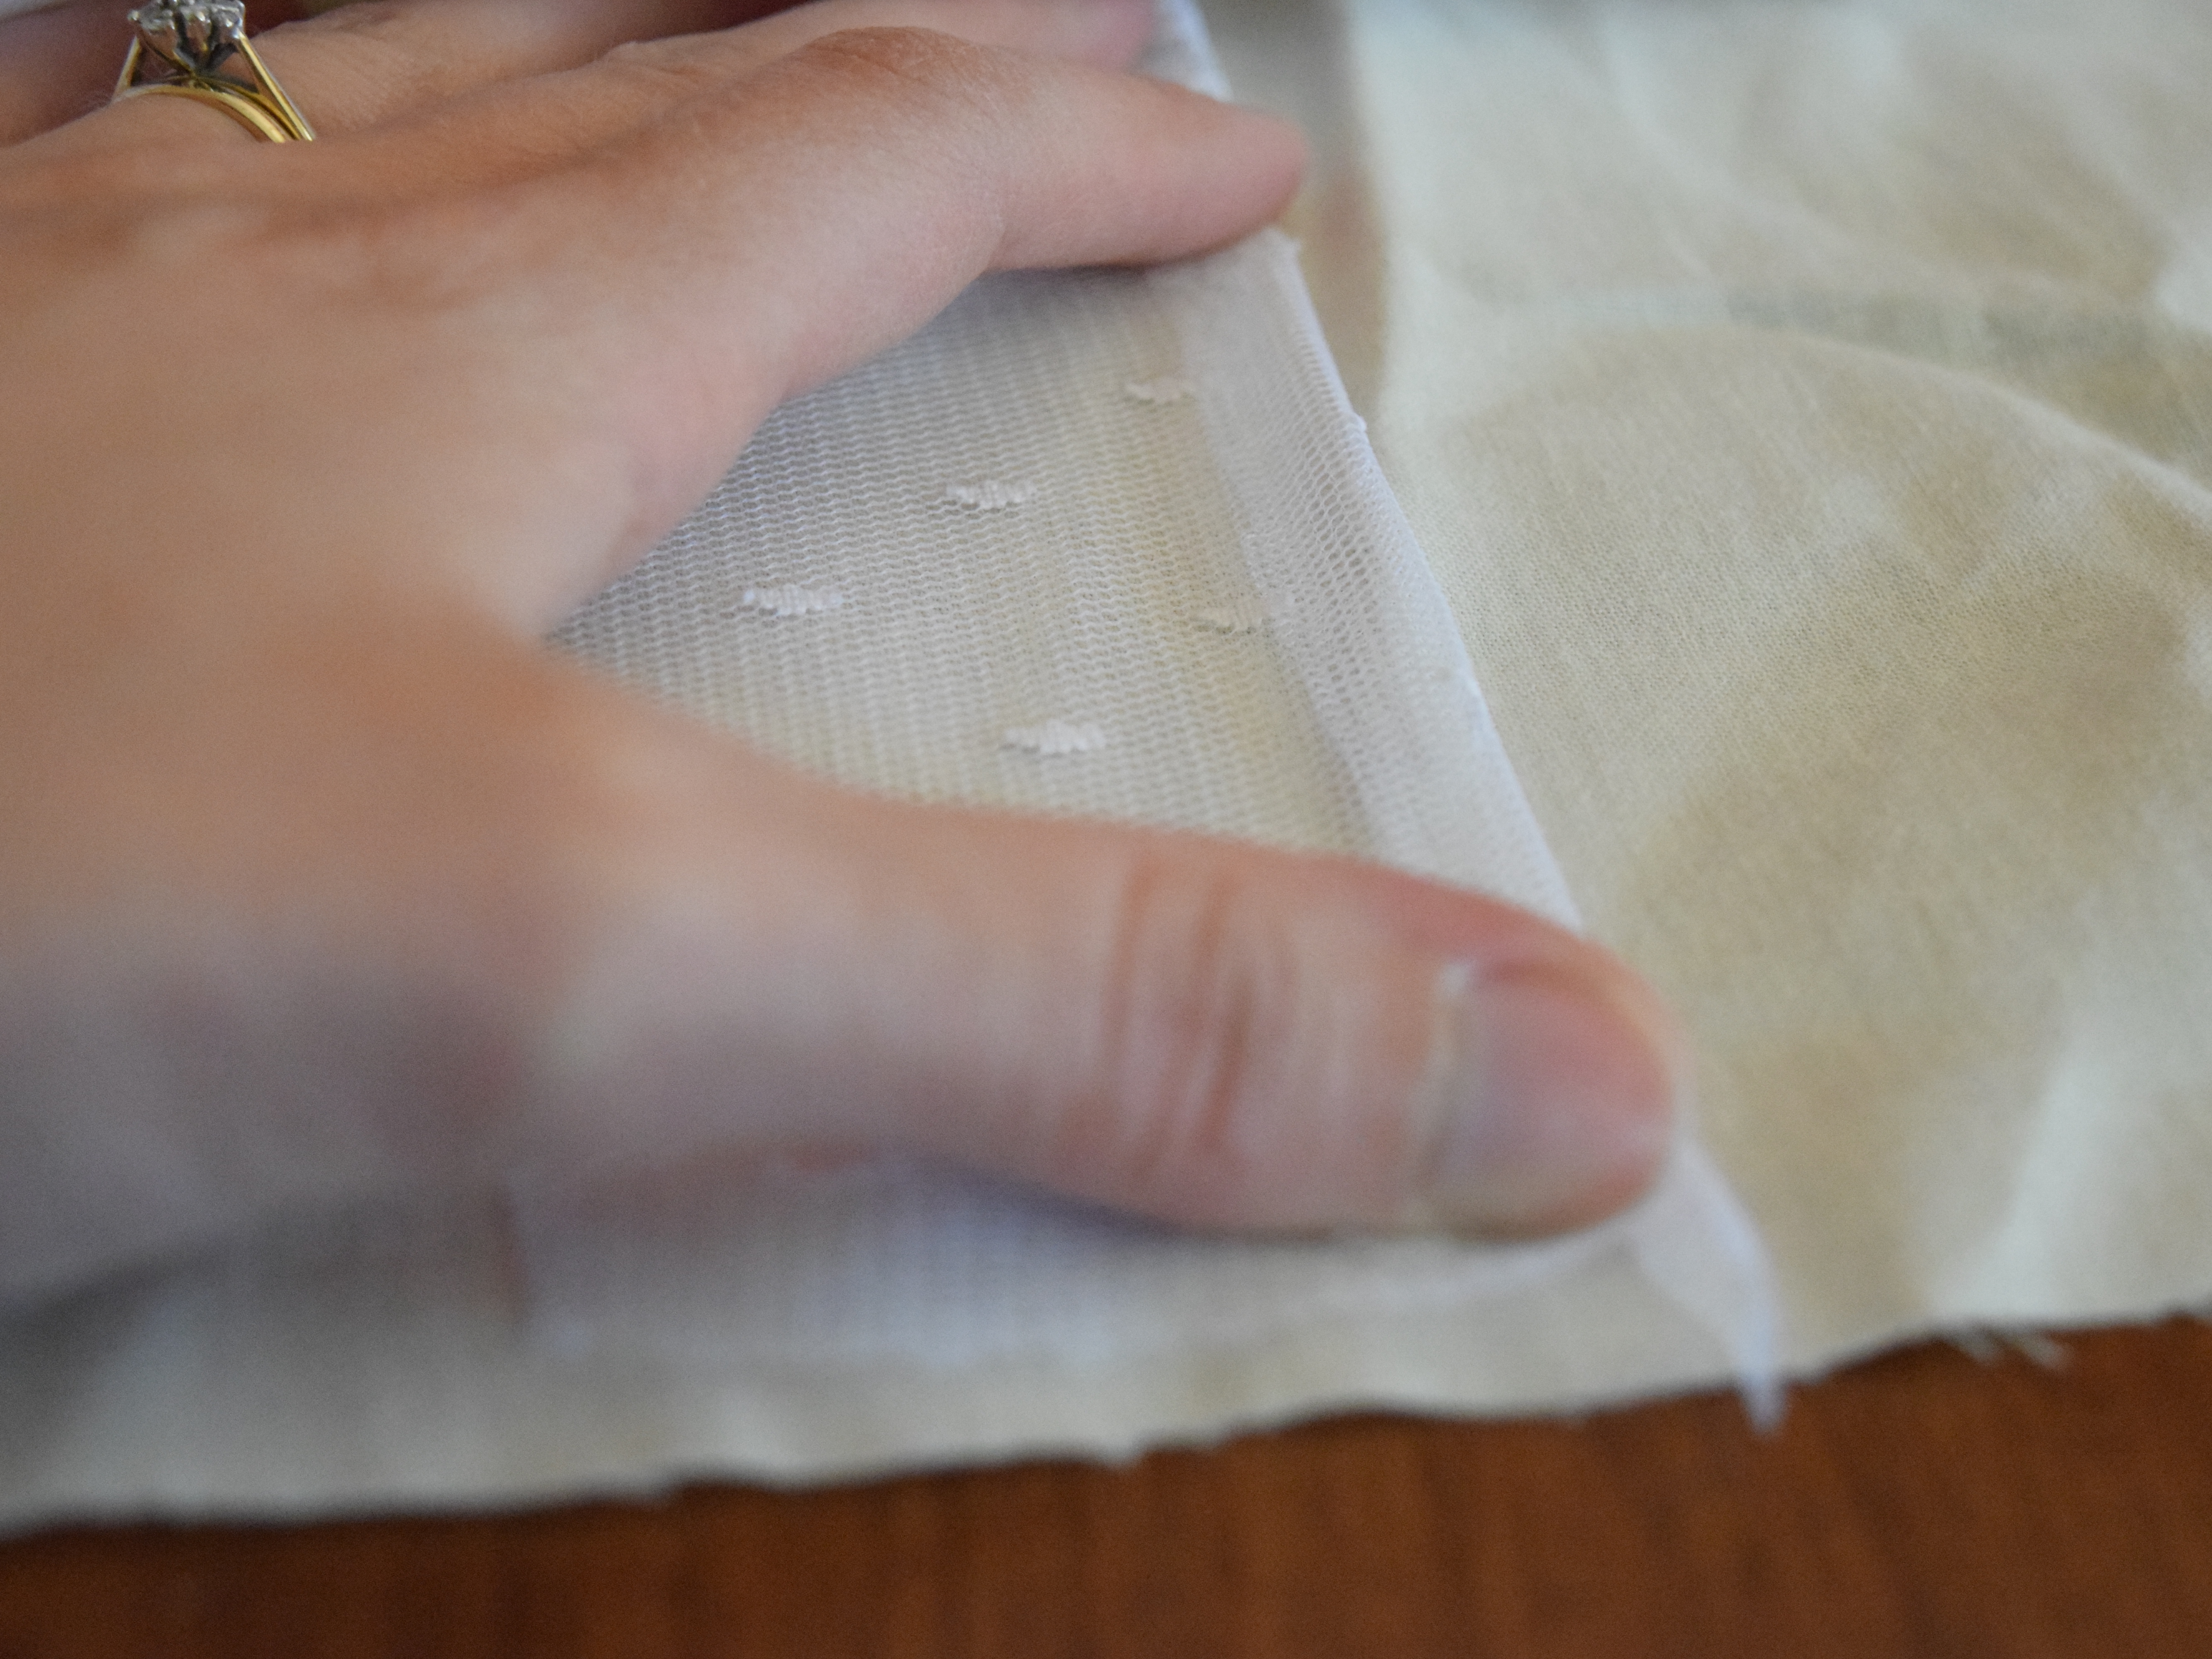
The first time I did this was on the sleeves of my Outlander costume, and I honestly never thought it would work out. But I listened to my mother had faith and lo: when I flipped it right side out, all was revealed! Make sure to pin everything in place before you sew.
7. If you are edging your runner, sew the edging fabric (lace, in my case) into the runner, sewing a normal, straight seam.
8. Do the same to the other end of the runner, but leave at least a few inches of the seam open, so that you can flip the runner right side out!
9. Cut a few notches in the fabric, so that it will lie flat. Press the seams flat. Do NOT skimp on the pressing! 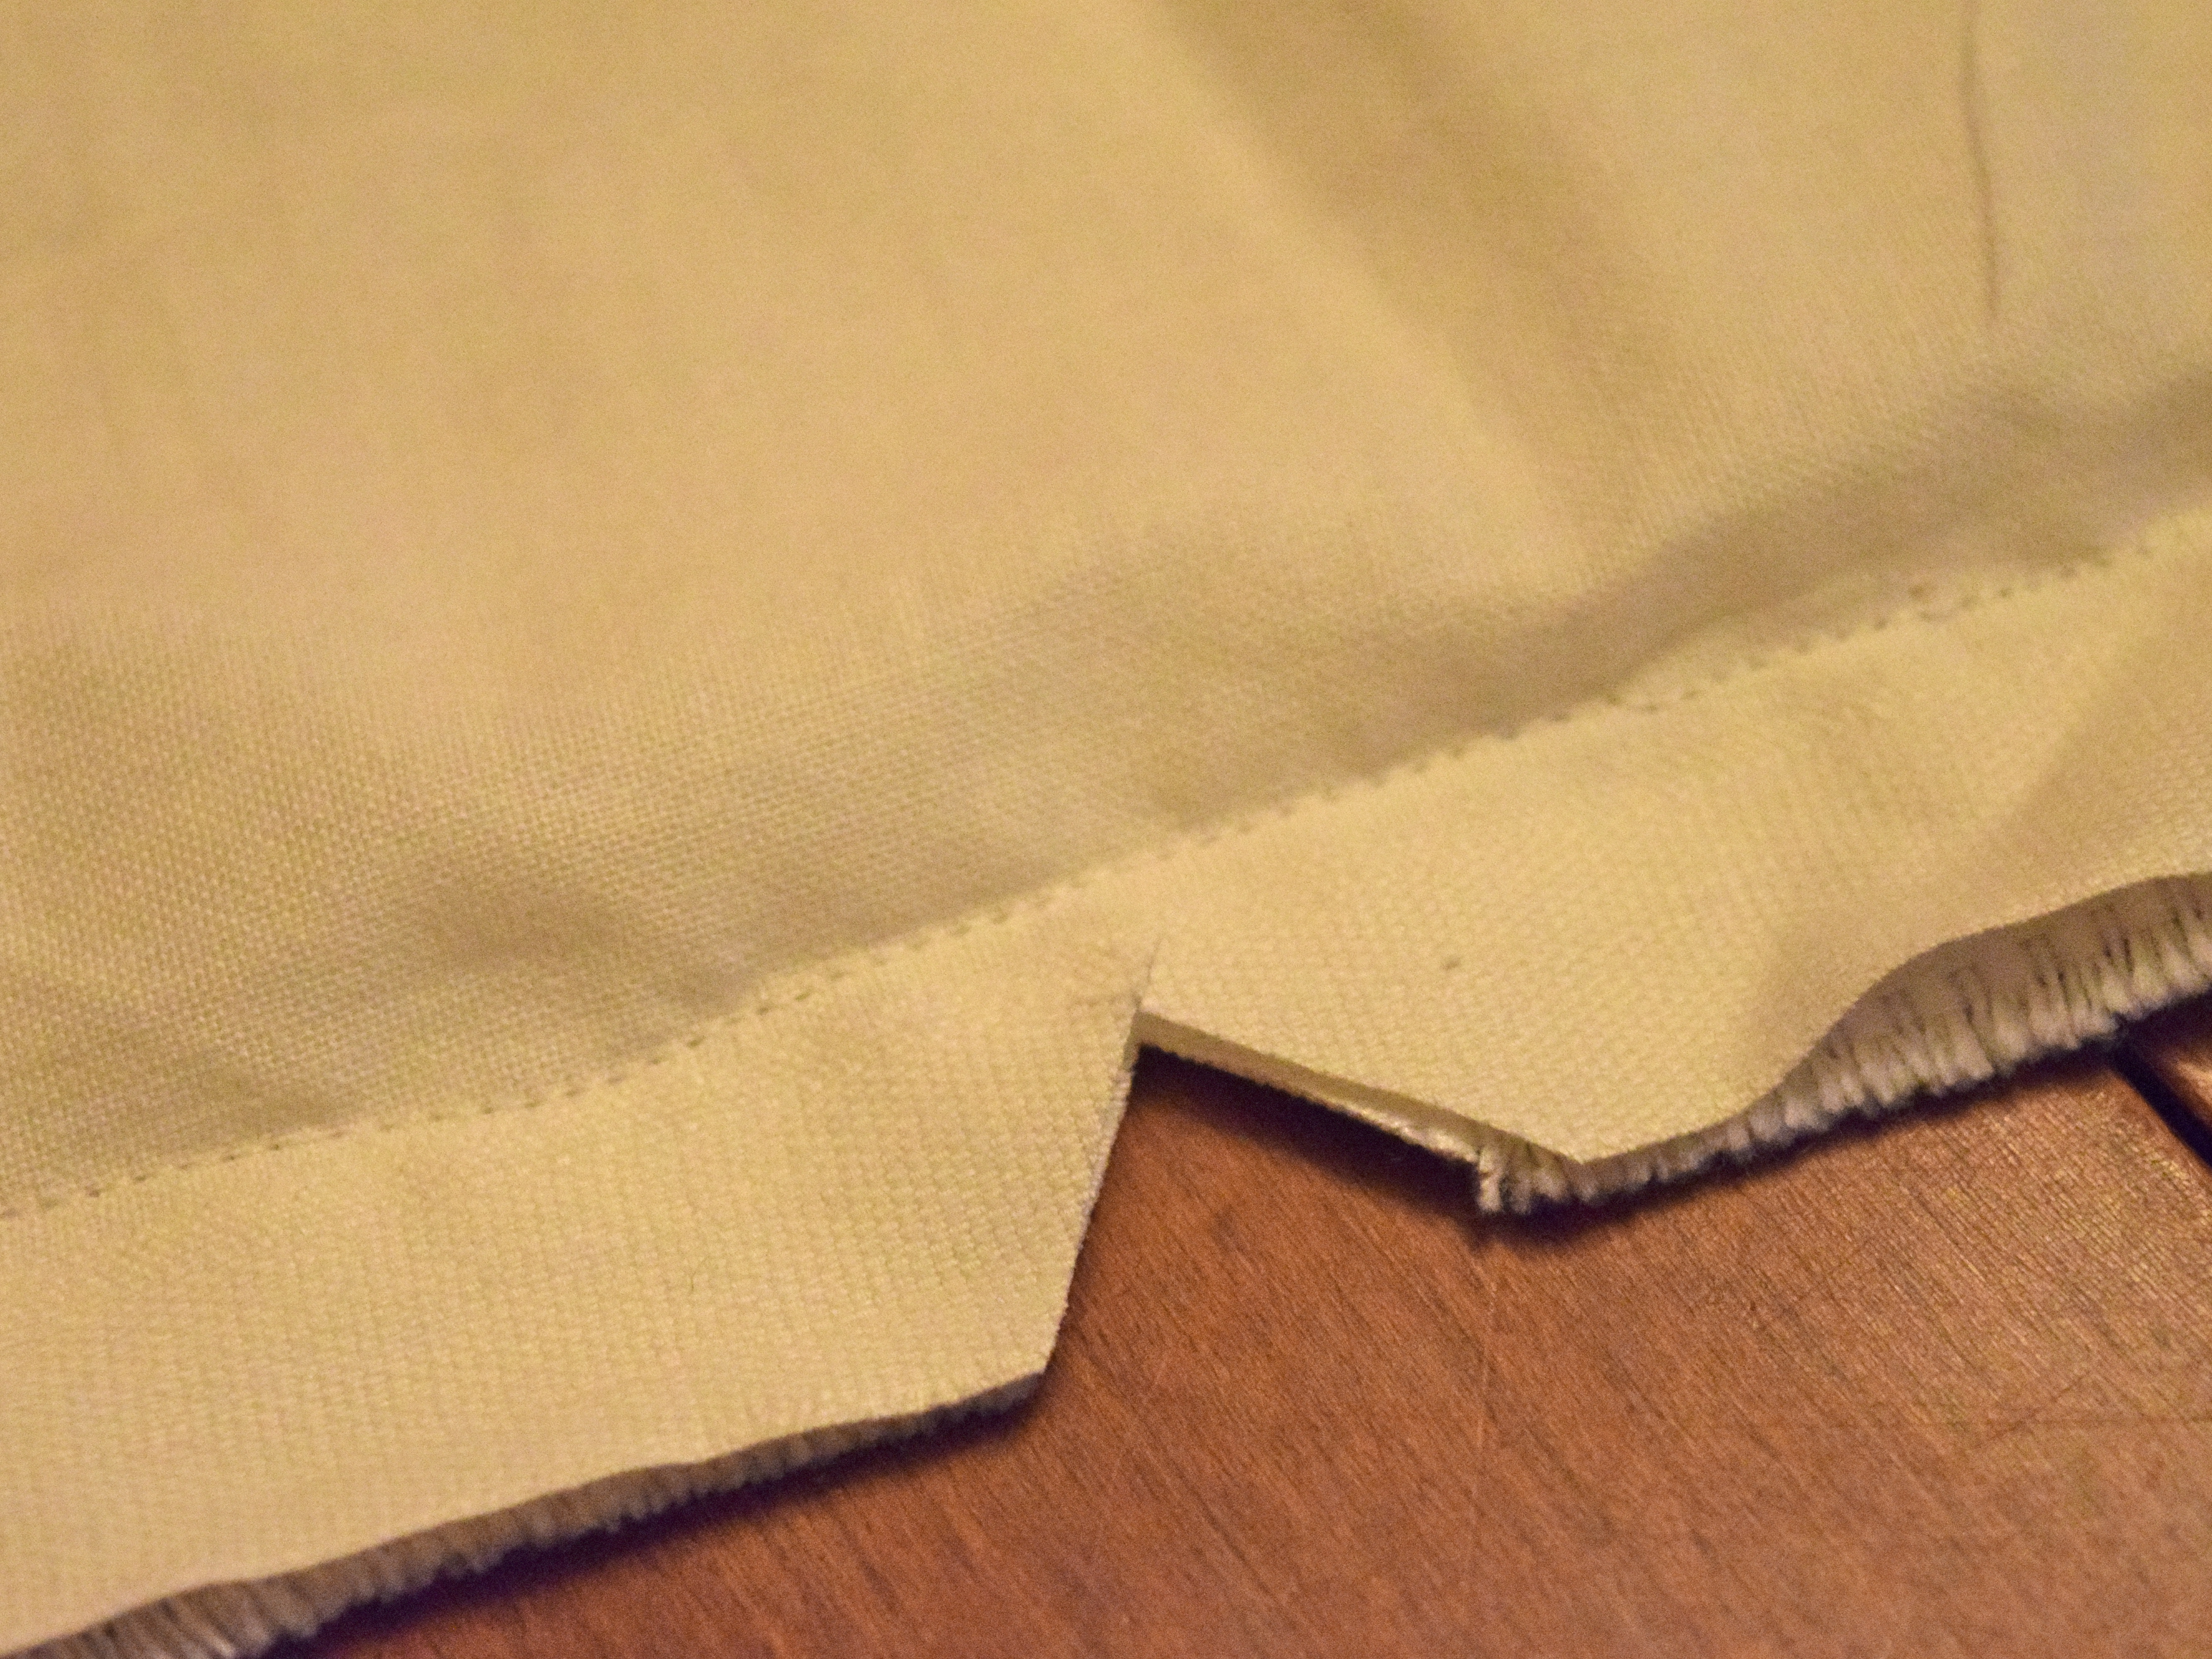
10. Turn the runner right-side-out, and hand-stitch the remaining few inches. Press, press, press away.
Et voilà! This post should have been called « How to Sew a Table Runner in 10 Steps ». It could have been turned into a movie with Matthew McConaughey playing the sewing machine repairman… 🙂 Unfortunately, (and I think, it was pretty darn inconsiderate of him) Matthew was unavailable to pose with the completed table runner. 🙁 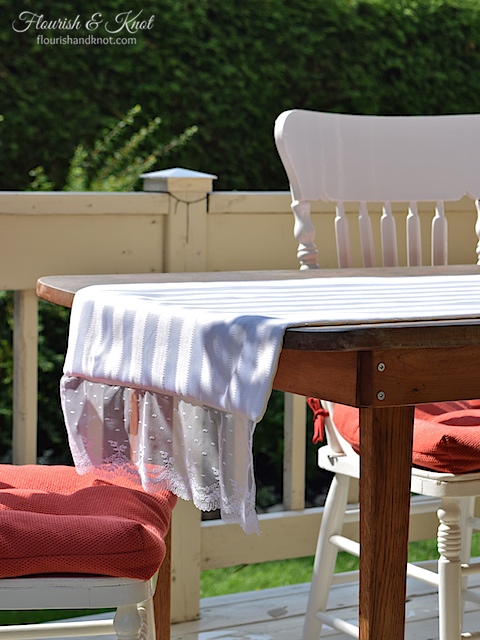
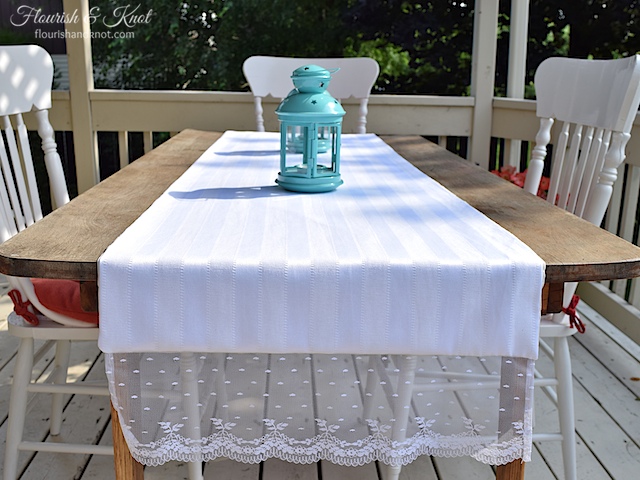
Whatever, Matthew. Whatever.
In other news, I’m off to a fabulous weekend at my first WordCamp Montreal! WordCamp (which, coincidentally, rhymes with « NerdCamp ») is a big conference for anyone who has anything to do with WordPress. I’ll be that person who stalks the Happiness Bar (like Apple’s Genius Bar but for WordPress) and takes ALL THE NOTES. Can’t wait to tell you all about it next week!
In the meantime, let me know if you’ve been working on any summer sewing projects (or DIYs in general). Leave me a comment and share your latest project! Have a great weekend! And to all my American readers: happy 4th of July!
***
This post was featured in the Sunday Brunch Magazine – July 2015 Edition!
This post was featured at Share it One More Time!
Here’s where I link up each week:
Mondays: Blogger Brags, Merry Monday, Monday Funday, Inspire Me Monday, Show & Tell, Lou Lou Girls
Tuesdays: Tell ’em Tuesday, Two Uses Tuesday, Together on Tuesdays, Tutorials & Tips, Tuesdays with a Twist, Hit Me with Your Best Shot, Tickle My Tastebuds, Treasure Box Tuesday
Wednesdays: Pin Worthy Wednesdays, Work it Wednesday, Wow Us Wednesday, Wake Up Wednesday, Wordless Wednesday, Whimsy Wednesday
Thursdays: Thrifty Thursday, Think and Make Thursday, Handmade Hangout, Weekend Re-Treat, Favourite Things, Artsy Fartsy Link Party, What to Do Weekends, Friday Features (Thursday), Fun Summer Finds
Friday: Fiesta Friday, Feathered Nest, Frugal Friday, Link Party Palooza
Saturday: Share it One More Time
Sunday: Nifty Thrifty Sunday, Silver Pennies, Sundays at Home, That DIY Party, Frugal Crafty Blog Hop, Share the Wealth Sunday
Monthly/Recurring: Great Blog Train, Sunday Brunch

