
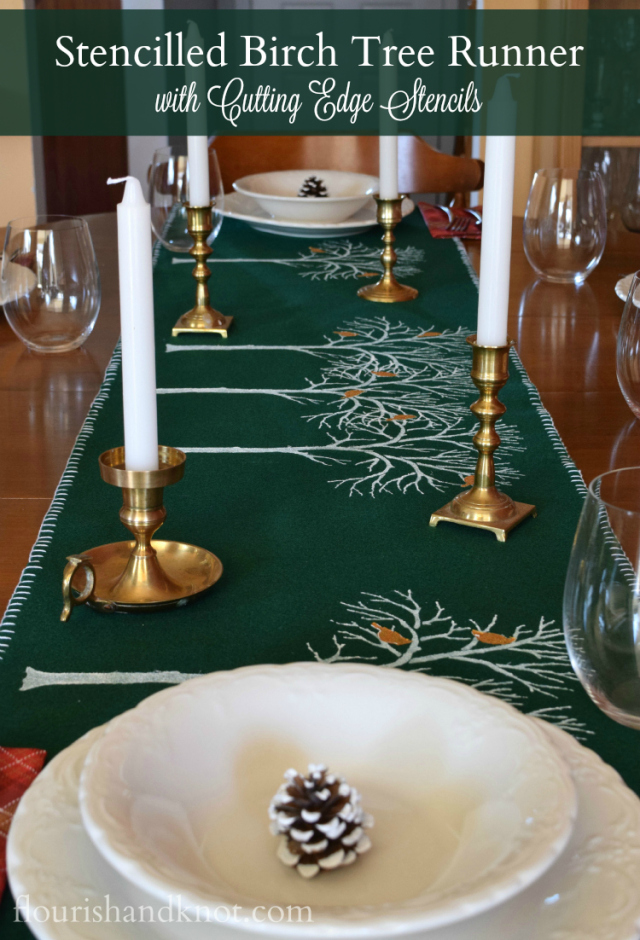
I’m thrilled to be sharing with you a project that I’ve been working on for the past two weeks: a rustic, elegant stencilled birch tree table runner! I was so pleased to be asked by Cutting Edge Stencils to feature their Winter Cardinals stencil in a holiday DIY project. When I heard that it would be another Create & Share Challenge, I was IN! Special thanks to Casa Watkins for hosting this challenge: I just love how these challenges push me to try new techniques and learn new skills.
I received one stencil kit from Cutting Edge Stencils in exchange for writing this post. All opinions are my own.
What you need:
- Approximately 2 meters heavy felt (in a colour of your choice)
- Rotary cutter or fabric scissors and SUPER steady hands
- Measuring tape, t-square, or cutting mat
- Approximately 16 meters (two skeins) white embroidery thread
- Embroidery needle, threader, scissors
- Stencil
- Acrylic paint in at least two colours
- Stencilling brush (round, flat bristles)
- Small paint tray
- Painter’s tape
- Protective surface
I’m not going to lie: this was a time-consuming project. I’m so grateful that I was able to borrow my mother’s rotary cutter and cutting mats, because that sped up the process a lot! I’ll show you a little more about how I cut and blanket-stitched the felt in a later post.
The first step was to cut my felt to the desired length and width. Because I was making this for a specific table (not mine, incidentally!), I made it 160 cm long and 35 cm wide. Using a rotary cutter was such a simple way to get a perfectly straight line. Love it. Gotta get me one of those. Oh Santa…!
Once I had cut my felt, I blanket-stitched my way around the runner. This. Took. A. Long. Time. But I got better as I went, and I discovered a couple of tricks. Again, I promise to share them in an upcoming post. Blanket stitching is extremely easy, and really, anyone can do it.
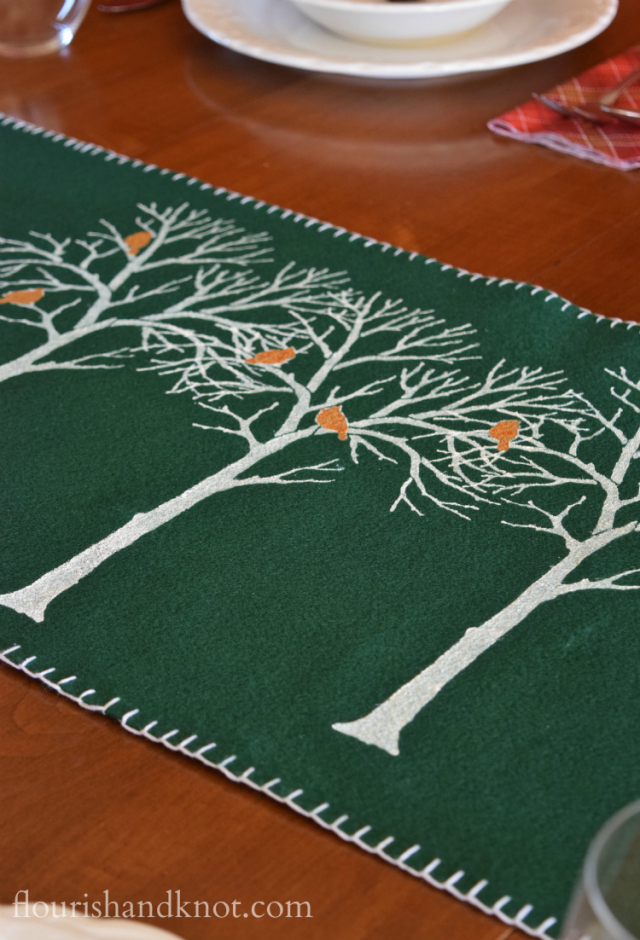
Stencilling the runner took quite a while, as I had to wait for the different layers and sections of the runner to dry before I could easily move on to the next. I began by stencilling the birch trees.

Once I had stencilled my forest of trees (okay, five of them), I added the layer of stencilled gold birds. To do this, I first stencilled the birds in white (to provide a light background for the gold paint), and when that was dry, I stencilled them again in gold. I didn’t want to have to re-position the stencil, so I did each tree’s birds separately before moving on to the next. So it wasn’t hard, but it did take time.
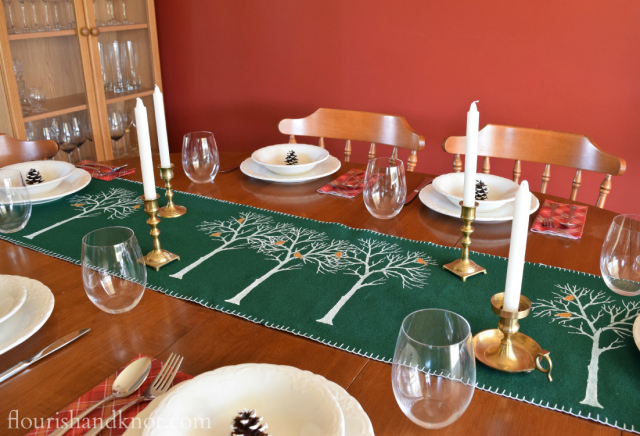
For the runner’s little glamour shoot, I set my table with brass candlesticks (you might remember them from my Christmas home tour), tartan napkins and white china. For an added woodland touch, I accessorized with some painted pinecones. I love my pinecone decor… 🙂
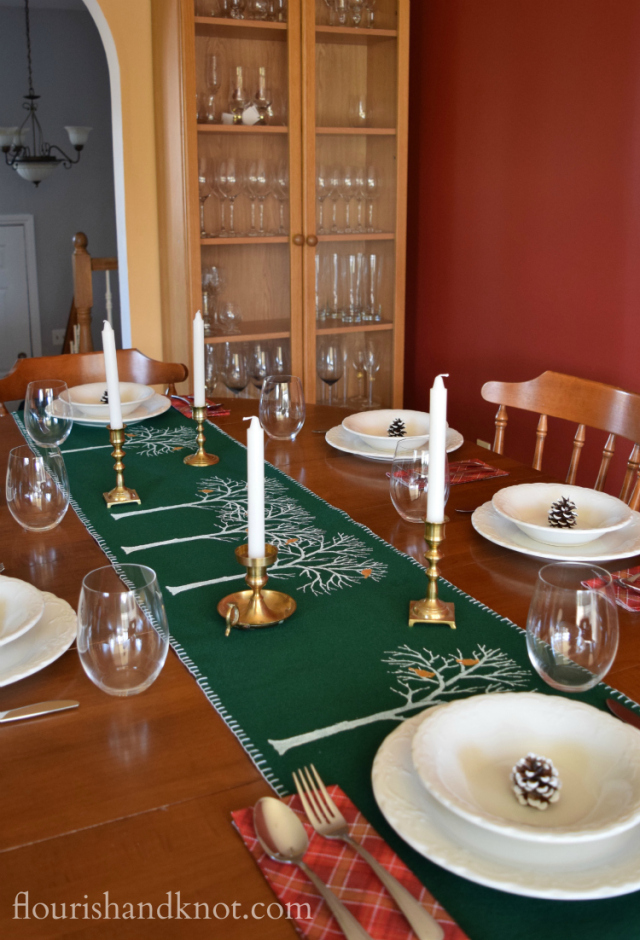
The great thing about a runner like this is that you really don’t need to add a centrepiece! The runner has enough visual interest on its own that you can keep your table setting very simple.
A note about heat-setting the acrylic paint: In order to make this runner hand-washable (Although I really recommend sponge-cleaning, not fully washing), I heat-set the paint by running the completed runner through the hot cycle of my clothes dryer for about 45 minutes. This is an important step for any project that could come into contact with food or drink!
I feel like my readers are coming to expect swag at the end of each post 🙂 and today’s is no different! Cutting Edge Stencils is hosting a giveaway of 5 (FIVE!) of their stencils kits ($50 value EACH!)!! So you, too, can make a beautiful stencilled craft for the holidays.
Click HERE to enter to win a stencil kit from CES!
Now it’s time to hop around and check out the other wonderful Create & Share stencilled projects. People got VERY creative with this challenge and I’m looking forward to seeing their lovely work. Inspiration ahead!

2. Refashionably Late ~ Christmas Pillow
3. Tastefully Frugal ~ Christmas Tree Ornament Shadow Box
4. Pocketful of Posies ~ Reclaimed Holiday Wall Art
5. Domicile 37 ~ Edgy Reindeer Tapestry
6. Casa Watkins ~ Noel Stenciled Planter Basket
7. Creatively Homespun ~ DIY Rusty Reindeer Wall Art
8. Around the Watts House ~ Holiday Tote Bag
9. Penny Love Projects ~ Window Wall Rack
10. Flourish and Knot ~ Stenciled Table Runner
11. Old House To New Home ~ DIY Chalkboard Merry and Bright Sign
12. Up To Date Interiors ~ Noel Basket
13. Our House Now A Home ~ Rustic Reindeer Canvas Wall Art
14. The House Down The Lane ~ Reindeer Wall Art with Lights
15. Green with Decor ~ Christmas Craft with Stencil and Frame
16. Pretty Practical Home ~ DIY Hot Cocoa Tray
17. A Shade of Teal ~ DIY Christmas Tree Glitter Sign
18. Uncookie Cutter ~ Hanging Ornament Boards
19. One Mile Home Style ~ DIY Stenciled Scrap Wood Holiday Art
Wow! I love it! And it works really well with brass candlesticks!
Thank you so much!
You need to package some of those up and sell them next year! So cute!
Thanks, Iris!
This is adorable! I like the placement of your trees on the runner!!!
Thanks, Sara!
This runner is so beautiful! And it looks amazing on your table. Great project and idea. I’m going to give a runner a try with one of my stencils. Thanks for sharing!
Let me know how yours turns out! Thanks for stopping by!
That turned out wonderfully! Your choice of white/gold/green means you can use it for just about any occasion. Really lovely.
Thank you so much – I’m glad you like it!
This is such a unique idea Sarah! I never thought about using the stencils to make a table runner, great idea and it turned out lovely!
Thank you so much, April!
What a pretty idea Sarah! It turned out great and I love all the gold birds! I’m pinning!
Thanks so much, Cat!
Your table runner turned out great! What a fun way to add a little something extra to your holiday decor!
Thank you, Ruthie!
This is super nice! I love the blanket stitches along the side. The stencilled pattern is so cute.
Thank you, Annie!
So cute! The runner turned out so well!
Thanks, Katy!
What a clever idea to use the stencils on a table runner. It looks great!
Thanks so much, Meg. Glad you liked it!
Gorgeous and so elegant! Looks beautiful!
Thanks, Benita!
I can’t believe you made that from a stencil! Amazing!
Thanks, Roxanne!
you have such a classic traditional style. I love how you chose a different stencil and it works so well with your tablescape. So pretty!
Thanks, Jess!
LOVING!!! I wasn’t sure how it was going to look based on the collage and this is absolutely pretty! I love your attention to details on the tree and the festive green color rocks! Pinned and shared
Super cute! I would love to have this on my table or draped across my piano! 🙂
Hi Sarah, your stenciling project came out so nice! What a pretty runner for the holidays!
Oh my goodness! I love your table runner. The little gold birds are the best touch!
This really turned out great!!! That green is amazing and so elegant! I’m so excited to see how fast this challenge is growing! I’m so glad you’re a part of it!! xo!